
What Is a Pistol Caliber Carbine? Everything You Need to Know in 2025
- by Casy Smith
-
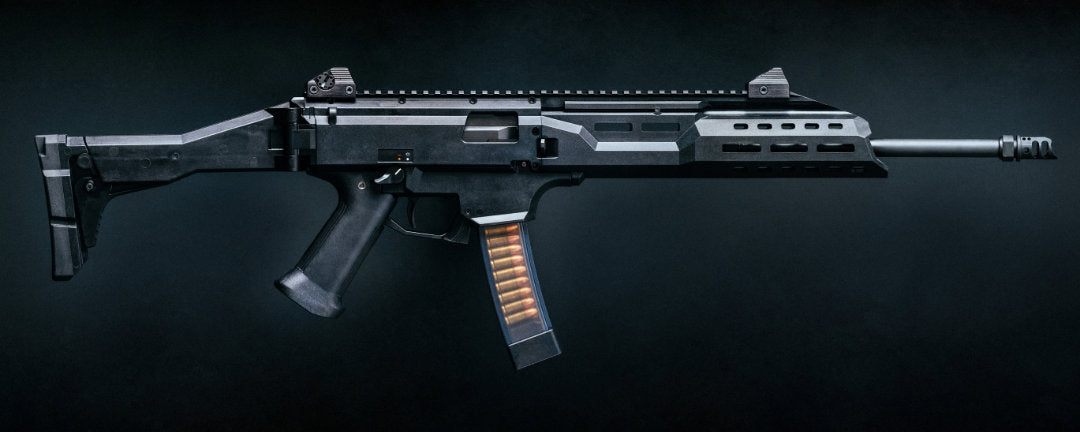
If you're exploring options for home defense, you've likely come across the pistol-caliber carbine (PCC). A PCC is a light, shoulder-fired rifle that uses common handgun ammunition like 9mm, .40 S&W, or .45 ACP.
This concept isn't new. It dates back to the American West, when cowboys and settlers wanted a rifle that could share ammunition with their sidearm. Today, that same principle of convenience, combined with the stability of a rifle platform, has led to a major resurgence in popularity. But is a PCC the right choice for you? Let's break down the pros, cons, and essential information for 2025.
What Does PCC Stand For?
Pistol-caliber carbines (PCCs) are guns that look like rifles, except they fire handgun ammunition like 9mm, 40 S&W, and 38 Special. PCCs are actually a subcategory of carbine rifles, which are generally shorter firearms and easier to handle compared to regular rifles.
Pistol-caliber carbines were popular in the 1800s American Wild West time period, according to Bob Meinecke of codyenterprise.com. A reason why these firearms are still so popular is that they offer added stability and accuracy for shooters using smaller bullets while also being semi-automatic.
Leading PCC Models and Manufacturers: 2025 Market Overview
The PCC market has seen significant innovation and growth between 2024 and 2025, with both established and emerging manufacturers introducing impressive new models.
Springfield Armory Kuna: This pistol-caliber carbine is a standout newcomer. It features roller-delayed blowback operation similar to the HK MP5 but at an accessible MSRP of $854. It boasts modern AR-style controls and has been praised for its reliability and soft recoil.
Smith & Wesson M&P FPC: At an MSRP of $549, the M&P FPC continues to dominate the compact/portable segment. Its folding design allows it to collapse to just 16.38 inches, making it a popular choice for its balance of portability and performance.
Ruger LC Carbine (.45 ACP and 10mm Auto): Ruger has significantly expanded its PCC lineup in 2025, introducing the LC Carbine in both .45 ACP and 10mm Auto. The 10mm version, priced at an MSRP of $1,049, offers enhanced terminal performance and maintains Glock magazine compatibility.
Pricing Information and Market Trends
The PCC market shows distinct pricing tiers based on our analysis of 19 popular models:
Budget Tier (Under $600): 5 models, including Hi-Point 995TS ($248), Extar EP9 ($450), and S&W FPC ($549)
Mid-Range ($600-$1,499): 8 models, representing the largest segment
Premium ($1,500+): 6 models, featuring advanced operating systems and premium materials
Average MSRP: $1,169 across all categories
Median MSRP: $1,000, indicating a healthy mid-market focus
Are Pistol-Caliber Carbines Legal? 2025 Federal and State Update
Disclaimer - This is not legal purchasing advice. For specific information about your state's laws, consult with a qualified attorney or check the United States Bureau of Alcohol, Tobacco, Firearms and Explosives website.
Basic Legal Framework
The legality of pistol-caliber carbines depends on barrel length and overall dimensions:
Standard PCCs: Carbines with 16-inch barrels and 26-inch overall length are classified as standard rifles and legal in most states with normal background checks.
Short-Barreled Rifles (SBRs): Barrels under 16 inches OR overall length under 26 inches require NFA registration and additional federal taxation.
2025 Pistol Brace Update: Good News for Gun Owners
Current Status: Pistol braces remain legal following major federal court victories in 2025. Both the Fifth Circuit (Mock v. Garland) and Eighth Circuit ruled the ATF's 2023 brace ban was "arbitrary and capricious," blocking enforcement nationwide.
The Reality: While these court wins protect brace owners, the ATF retains authority to prosecute under existing laws, creating ongoing uncertainty as appeals continue.
Market Impact: Many manufacturers now focus on traditional 16-inch carbines to avoid regulatory complications entirely. Popular options include folding designs like the Smith & Wesson M&P FPC for compactness without brace concerns.
Other 2025 Legal Updates
"Ghost Gun" Rule: The Supreme Court upheld ATF authority over 80% receivers in March 2025, primarily affecting DIY builders rather than complete PCC purchases.
State Laws Still Apply: Federal court rulings don't override state restrictions. Several states maintain assault weapon bans, magazine limits, or feature restrictions that may affect PCC ownership.
Buying Recommendations for 2025
Safest Choice: Traditional 16-inch barrel PCCs with standard stocks avoid all regulatory uncertainty.
Research Local Laws: State and local restrictions may be more limiting than federal law.
Stay Informed: The legal landscape continues evolving through ongoing court cases.
Traditional pistol-caliber carbines with 16-inch barrels remain fully legal and represent the most straightforward choice for buyers seeking to avoid any potential complications. By choosing conventional configurations, you can confidently invest in these versatile firearms while staying well within legal boundaries.
Pistol Caliber Carbine Pros and Cons: Is a PCC Right for You?
Before investing in a pistol caliber carbine, weigh these key advantages and drawbacks to determine if it's the right choice for your needs.
4 Key Advantages of Pistol Caliber Carbines
1. Superior Accuracy and Stability
A PCC's longer sight radius and rifle-style stock provide significantly more stability than handguns. The additional contact points reduce felt recoil and allow for more precise shot placement, especially at distances beyond 25 yards.
2. Shared Ammunition with Your Handgun
Use the same 9mm, .40 S&W, or .45 ACP ammo as your concealed carry pistol. This simplifies your ammunition inventory and often means your handgun magazines work in the carbine too, reducing overall costs.
3. Reduced Muzzle Flash and Noise
The longer barrel burns powder more completely, resulting in less muzzle flash and noise compared to firing the same cartridge from a handgun. This advantage is crucial in low-light home defense scenarios.
4. Faster Follow-up Shots
The carbine platform's stability enables quicker target reacquisition between shots, making it more effective for multiple-target scenarios or when accuracy under stress is critical.
3 Potential Disadvantages of PCCs
1. Over-Penetration Risk in Home Defense
Higher velocity from longer barrels can cause handgun rounds to penetrate deeper than expected. This increased energy may pass through targets and drywall, potentially endangering others in your home.
2. Storage and Portability Challenges
Even compact PCCs are larger than handguns, requiring more storage space and specialized concealment solutions. Consider your available storage options before purchasing.
3. Redundant Role with Existing Firearms
If you're already proficient with a defensive handgun, a PCC might not add significant capability for typical home defense distances (under 15 yards) while requiring additional training and maintenance.
Bottom Line: When PCCs Make Sense
Pistol caliber carbines excel for shooters who want rifle-like accuracy with handgun ammunition costs. They're ideal if you need better precision than a handgun but don't want the power and penetration of rifle cartridges.
Best for: Home defense in larger properties, new shooters building confidence, or anyone wanting to maximize their handgun ammunition investment.
Skip if: You're satisfied with your current handgun accuracy, have limited storage space, or prioritize maximum portability above all else.
Where Can I Store My Pistol-Caliber Carbine?
If you’ve decided that a pistol-caliber carbine is best for your home defense setup, store it safely and discreetly with a concealment flag or piece of furniture from Liberty Home Concealment. All of our products are handcrafted in the United States, so you can rest assured that you’ll be able to access your firearm when needed and no one else will. Check out our full lineup of products today.
FAQs
What is a pistol-caliber carbine (PCC)?
A PCC is a light, shoulder-fired rifle that uses common handgun ammunition like 9mm, .40 S&W, or .45 ACP instead of traditional rifle cartridges. It combines the ammo compatibility of a handgun with the stability of a rifle platform.
Is a pistol-caliber carbine the same as a pistol?
No. While a PCC fires handgun ammunition, it is built and fired like a rifle, with a shoulder stock and a longer barrel. This gives it more stability and accuracy than a standard handgun.
Are pistol-caliber carbines legal?
Standard PCCs with a 16-inch barrel and 26-inch overall length are classified as regular rifles and are legal in most states with a normal background check. Carbines that fall under those length thresholds are classified as short-barreled rifles and require NFA registration. State laws can add further restrictions, so it's worth checking local regulations or consulting an attorney.
What are the main advantages of a PCC over a handgun?
PCCs generally offer better accuracy and stability thanks to their longer sight radius and stock, shared ammunition with a handgun for simpler inventory and cost savings, reduced muzzle flash and noise from the longer barrel, and faster follow-up shots due to the added stability.
What are the downsides of using a PCC for home defense?
The main concerns are over-penetration risk, since handgun rounds fired from a longer barrel can travel with more velocity and penetrate deeper through walls, plus the added storage space a carbine requires compared to a handgun, and potential redundancy if you're already confident with your handgun at typical home defense distances.
How should I store a pistol-caliber carbine at home?
A PCC can be stored securely and discreetly using concealment furniture or a concealment flag sized to fit a rifle-length firearm, giving you fast access while keeping it out of sight.
