Best Practices for Buying a Used Gun

  • by Casy Smith
Best Practices for Buying a Used Gun

Jump to:

With the price of everything going up, we're all looking for a good deal. From everyday necessities to luxury buys, it's tempting to scour the Internet, clip up the coupon books and peruse the bargain bins to find that diamond in the rough. Unfortunately, firearms are not immune to rising costs, which has encouraged budget-conscious firearm shoppers to look toward the used gun market. 

Whether you're looking to buy your first handgun or add an antique firearm to your collection, buying a used gun is a common practice among firearm owners. You can save a few bucks by purchasing a used gun, but many sought-after firearm models are no longer in production, so they can only be bought preowned.

Used firearms are commonplace in the industry, as many firearms are bought and sold numerous times over their lifetime. If you think a preowned firearm is the right route for you, it's essential to develop a critical eye out to make sure you know what you are getting. 

Don't worry; you can find a great used firearm with a little work. Keep reading to learn more about how to buy a used gun. 

How to Buy a Used Gun: Getting Started with Research

Before you decide to look at a firearm or make a purchase, you need to get a complete understanding of the gun you want. Reviews, used listings and online content about the specific firearm you want can help you note any common mechanical failures and familiarize yourself with the firearm. 

You want to stick with reputable brands from quality manufacturers. In addition to their reputation for working longer, they tend to have better service or repair offerings than lesser-known firearm brands. Also, personalization options are wider for large manufacturers. 

Reviewing a resource like the Blue Book of Gun Values is a great place to begin, as it offers relative values based on the gun's condition. A little bit of research can go a long way. Once you understand your potential firearm inside and out, you can start looking for a dealer who has one in stock. 

Buying a Used Gun: Buying from a Reputable Dealer

There are a few purchasing options you can go with whenever you want to buy a used gun, each with strengths and weaknesses in the transactional process. Let's take a look at some common vendors. 

Visiting a Gun Shop

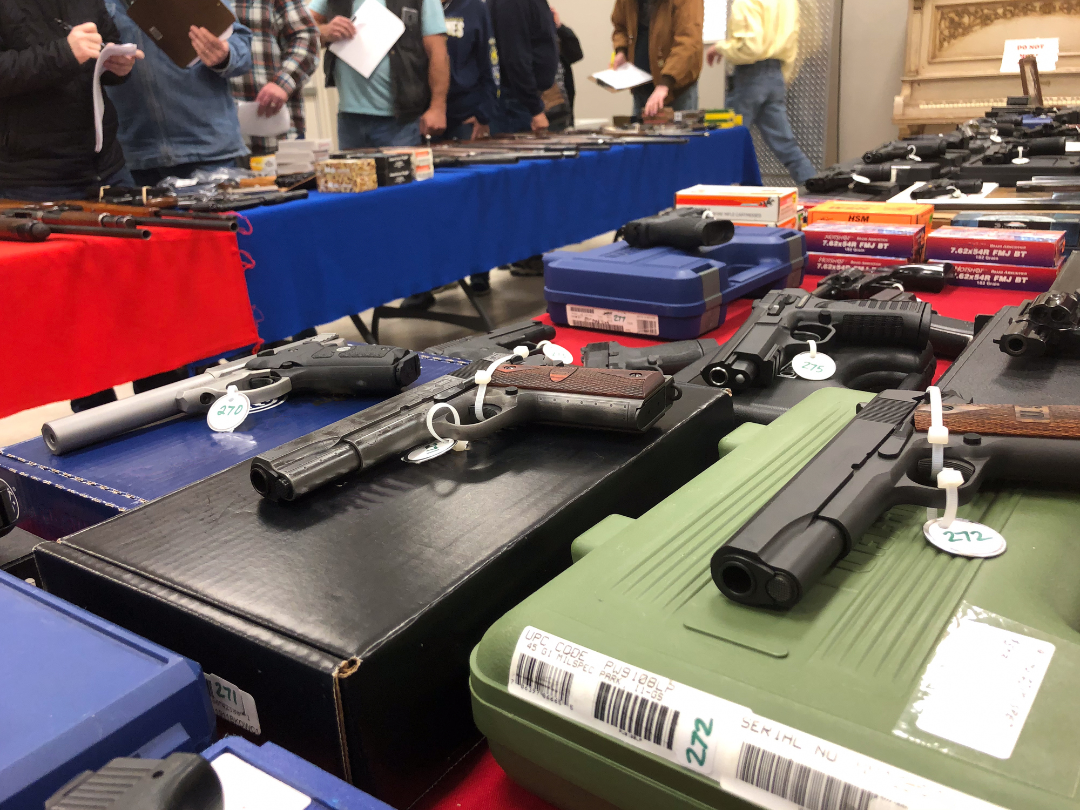
Gun shops are great for purchasing a used gun because you can observe the firearm up close and inspect it yourself. This is their biggest selling point, as online sellers can only provide images of the firearm. Traditional firearm dealers also have staff who can answer any questions you have about the firearm. Finally, most reputable gun shops will offer a warranty or return policy to help you feel more comfortable with your purchase.

While supporting a local gun shop is a great idea when buying a used gun, the two biggest downsides of this type of merchant are that they don't have the biggest selection and most likely won't have the lowest price on your firearm of choice. 

If you don't want to walk into a brick-and-mortar store, can the Internet do enough to supplement the in-person experience of buying a used gun? 

Using the Online Marketplace

There are several online gun dealers you can explore. Some will ship firearms directly to a Federal Firearm License (FFL) holder for you, and others offer a platform to meet with sellers to complete a transaction in person. The Internet can widen your firearm purchasing horizons as you can connect with sellers across the country, increasing your odds of finding your preferred firearm at a lower cost. 

While the Internet has opened up many shopping avenues that would otherwise not exist, it has also opened up individuals to more risk than ever when shopping. Scams abound, and it's easy to get caught up in the moment looking for a great deal. There are many reputable online dealers, too, so it's important to check reviews of the store before making the purchase. If the cost seems too good to be true, it probably is. 

Plus, a purchase from an online shop can add high shipping and FFL fees to the final cost, eating into your savings. Always try to get a total of all fees before deciding on an online purchase. 

Keeping It Legal 

It's essential to review your state and local laws before completing a firearm transaction. Some states require all transactions to go through an FFL. Weapon classifications are also different from state to state, so you want to see what your particular firearm is considered before the buy. 

Now that we've had a moment to discuss common places you can buy used firearms let's take a look at some flaws you should watch out for before making the final purchase. 

How to Buy a Used Gun: Flaws to Observe

While a gunsmith can offer a more in-depth inspection, you may not have that luxury when making the final purchase. It's important to look for any fatal flaws that will automatically disqualify the weapon from your consideration.

The Packaging

Before you lay your eyes on the firearm, it's important to look at all of the details of the gun's packaging. If the firearm is still in its original box with the paperwork, this is a good sign that the firearm has not been used heavily.  

On First Inspection

  • Rust, cracks and pitting. These structural deformities are difficult to repair and tend to only worsen over time. 
  • Dents and gouges to the exterior. These defects should automatically raise a red flag as they can affect the gun's performance and ability to fire safely. 
  • Damaged screw heads. A deformed fastener top is a tell-tale sign of amateur gunsmithing. You shouldn't pay a premium for someone's project. 

Looking at the Firearm In-hand

If you get an opportunity to look at the firearm up close and test some of its basic functions, here are a few items you should address:

  • The safety, magazine release and slide lock. All of the firearm's basic controls should operate smoothly and feel crisp. Mushy or overly stiff actions may be a sign of unseen wear and tear to the firearm.
  • Pitting or lack of rifling in the bore. When you can safely look inside the bore, make sure it is free of deformities like rust and pitting in the bore as well. These blemishes can affect a bullet's trajectory and your safety. 
  • Trigger pull. It's always a great idea to dry-fire the gun in question if the seller allows it. This gives you a chance to test the trigger resistance to ensure it isn't too heavy or light when firing. 

The bottom line: if the firearm looks and feels good in the hand, you are usually in good shape. 

Caring for Your Used Firearm

Once you've made your purchase, it's essential to care for your firearm to keep it in excellent condition. Remember, few people "wear out" a firearm from constant use. Rather, guns more commonly wear down due to poor storage conditions or a lack of care

You'll want to take your firearm to the range, clean it consistently and make sure it's stored in a secure, concealed spot. The concealment furniture at LHC can help you accomplish this. Check out our full product listings today. 


Hanging instructions for the Patriot Wall Shelf

Factors to consider befor you start

Installing a Patriot wall shelf can be a very simple project but there are several factors that you need to understand. our shelves have been designed to work with standard pine 2X4 construction that was 16" on center. Because they were designed around the 16" on center pine 2X4 framed walls that is the process for our instructions. Installing the shelves on amy other type of wall is done at your risk. Liberty Home Concealment does not advise you to attempt installing your shelf onto amy other type of wall.

Understanding what is beneath your walls

Anytime you are doing work or attaching something to a wall it is wise to have a solid grasp of what lies beneath the surface of your walls. If you are not comfortable with the task of hanging a shelf on your wall perhaps it would be wise to hire a licensed, bonded, and insured contractor to install the shelf on the wall for you. There are many factors that you should consider prior to beginning yur shelf installation. SAFETY is the first and top priority.

Safety First

As a consurmer of Liberty Home Concealment, it is a safe assumption that you are a gun owner. Liberty Home Concealment sincerely hopes that you have a great grasp of the concept of SAFETY FIRST. The installation of our shelves requires several steps and we highly recommend that you have a friend help you with the installation. This is very important as the size and moving parts of the shelves can make the installation very cumbersome and potentially dangerous for a single person to accomplish by themselves. So please, we urge you to get some help. Secondly, proper tools that are in good serviceable condition are a must. Please use your tools in a manner consistent with the manufacturers intended use. Using proper tools can make the installation quick, simple and enjoyable. But most importantly, SAFE. So, save yourself the trouble and use the proper tools.

CAUTION!!

Failure to follow and comply with these instructions could result in INJURY and even DEATH!

Tools that should be considered for a safe proper installation

Stud finder, Tape measure, Pencil, Level, Electric screw driver, and Safety glasses.

Step 1

Confirm your desired wall has adequate support by finding the studs with the stud finder. Also, remove the foam insert until later instruction. Mark your stud locations and transfer those measurement onto your shelf. Drill pilot holes through shelf in marked locations. We recommend using a 1/8" or 3/16" bit for the pilot hole. A hole too big will allow the screw to pull right through the back of the shelf. That would be bad. And unnecessary. Please use the proper drill bit. Depending on your wall you should be able to locate at least two studs to anchor your shelf into for maximum strength. Some walls may even allow for three studs to be anchored into. The shelf MUST use at LEAST (2) pine 2X4 studs and the shelf bracket's to fully support the finished loaded weight.

Step 2

With the help of a friend, and using a level and your original measurements hold the shelf in its desired location and transfer the pilot hole locations to the wall. You should be using a minimum of two studs for this step. Each stud receiving (3) screw locations. Two internally, and the other two in the brackets on top. For now, only focus on marking the internal locations. Mark the four internal screw holes. Make sure to hold your shelf nice and level for this step or yur final installation will be crooked.

Step 3

With the help of a friend, hold the shelf into its' mounting location. Line up the holes in the shelf with the marks in your wall and your wall anchors, and install the six long wood screws into the wall. Four into two different studs, and two into the wall anchors.

Step 4

Installing the shelf brackets to the TOP of your shelf. At this point your shelf is attatched to the wall but it is not ready for any weight. Please DO NOT ADD ANY WEIGHT until you have firmly mounted and anchored your brackets into the top. Have your friend help you support the weight of the shelf until you can get the brackets tightly mounted to the desired location on your wall studs. Again, use two studs. Do not add weight to your shelf either inside, or on top, until both brackets are fully installed. Using the supplied 3/4" screws attach brackets to the top of the shelf and 2 of the longer screws for the stud attachment.

Step 5

Unlocking your shelf. Use your magnetic key to locate and unlock the bottom of the shelf. Do this while the shelf is open so you can see what is going on. You may even want ot make two small marks on the bottom of the shelf if it helps you to locate the pickup. It will take a little practice to find the location of the magnetic pick up but you will find it. Make sure you aren't inadvertently trying to unlock the gas damper. Once the location of the lock pickup is located, the magnet will hold itself in place. However, the shelf will not fully disengage the locks until you release the pressure on the locks by lifting the shelf slightly upward with a simple squeeze of your hands. Once you hear the audible clicks of the locks disengaging you can slowly open the shelf allowing the gas damper to lower the shelf to its resting stop.

Concealment Picture Frame Installation Instructions

Consider What is Beneath Your Walls

Anytime you are doing work or attaching something to a wall it is wise to have a solid grasp of what lies beneath the surface of your walls. If you are not comfortable with the task of cutting a hole in a wall perhaps it would be wise to hire a licensed, bonded, and insured contractor to install this item in the wall for you. There are many factors that you should consider prior to beginning your shelf installation. SAFETY is the first and top priority. CAUTION!! Failure to follow and comply with these instructions could result in INJURY or even DEATH!!

Recommended Tools

These tools are not required to install your Liberty Home Concealment picture freame however they will help with the installation process. Stud Finder, tape measure, level, pencil, jigsaw, circular saw, keyhole saw, Sawzall, drill/driver, inspection mirror, flashlight and a second set of hands to help with marking your wall before cutting. These products were designed to work with "standard" 2X4 construction that was framed on 16" centers.

Step 1

Acquire all the tools to complete the job. Do not forget about proper personal protective gear.

Step 2

Confirm that your wall space is empty!! Failure to do so could result in serious injury or even death!

Step 3

Clean your work area around your desired install location. Cover any furniture with a tarp, drop cloth, or painter's plastic to aid in quick easy cleanup.

Step 4

Use a stud finder to locate the space between two studs. Confirm that you have 14.5" between the two stud edges before marking and cutting your walls.

Step 5

The back box of your picture frame is the size you need to make your hole. Hold picture frame tight against the wall and use your level to ensure frame is sitting level against the wall. On smaller sized picture frames such as 5"X7" and 8"X10" you will fasten to both studs. While holding the picture frame tight against the wall while checking for level and trace around the outside perimeter of the picture frames back box.

Step 6

Before cutting the entire wall opening Liberty Home Concealment recommends that you cut a small hole within the area that wil become the full-size hole. This is done to check and confirm your wall is truly clear of obstructions inside the wall such as electrical wiring plumbing. It's much easier to patch a small hole vs repairing a large hole because you got ahead of yourself. Do not skip this step!!

Step 7

Once you are sure that there are no obstacles inside your cut area, cut the full rectangle that you have marked previously. Remove drywall cutout away from the wall.

Step 8

Slide your new insert/picture frame into the hole you just cut.

Step 9

Use the supplied screws to fasten to the stud or studs that run up the sides of the rear of the box. On smaller frames box will only fasten to the stud you biased your hole towards.

Picture Installation

1. Lay frame face down on soft surface such as a towel or blanket. 2. Hold firmly and slide picture frame in to the open position. 3. Remove four metal picture retainer clips, if clips are tight use a flat bladed screw driver to wiggle free. 4. Remove wood backer noard and lay picture onto glass. Making sure of proper orientation. 5. Reinstall backer board and 4 retaining clips. 6. Slide picture frame closed and enjoy!

Wall maunting instructions for Freedom Series Coat Rack

Recommendation

Liberty Home Concealmemt does not recommend the use of hollow wall anchors to mount larger items on your walls. While anchors may provide sufficient holding capability, Liberty Home Concealment recommends attaching directly to the studs located inside your wall to ensure the most secure level of attachment.

Step 1

Choose the desired location of the item you are wanting to mount your coat rack.

Step 2

Once you have your ideal location use a stud finder to locate 2 studs in your wall that will support your coat rack. Mark the location of each stud's center with a pencil. Use a nail to confirm stud has been located.

Step 3

Hold product against wall and use level to make sure it is even. Use a friend to help hold level while transferring stud location marks to inside of product to be mounted. Tip: Remember the adage "Measure twice cut once." That same rule applies when making holes in your walls.

Step 4

Check that product is plumb and level before securing. Once proper placement is achieve fasten first screw through product and into stud. Re check for level and attach second screw into next stud.

Step 5

Step back and admire your handy work. Now get started filling your piece of concealment furniture with all the items you are wanting to keep stored securely out of sight. ENJOY!!

YOUR CART (0)

No Products in the Cart